Furniture and Woodworking
Woodworking as a Passion
My introduction to woodworking was in college, back in the early 60's. Working on an Industrial Arts BA degree I had a professor who was the consumate woodwork artist and craftsman. Conrad Johnson ran his woodworking shop/studio with strict rules and demanded high standards. I can't say that I was a natural, or that I had the interest and motivation to continue with the development of my woodworking skills at that time - I was much more interested in electronics and mechanics - but years later the things I learned and the high standards of craftsmanship Mr. Johnson instilled in me came through in the work that I have done and am now doing.
When I was first introduced to Arts and Crafts/Craftsman Style/Mission Style, I fell in love with the simple lines and especially the quarter-sawn white oak that so many crafts people and artists have used in their work.
Side Table
This simple Arts and Crafts style side table is constructed of red oak. I made it about 12 years ago just after I retired and had the time. This was the starting point in furniture building.
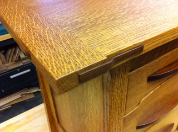
Another Side Table

This table is a Charles Limbert design. The challenging part for me was the clamping and gluing, as the shelf is floating, held in place by the four legs. This allows dimensional changes as the temperture and humidity change.
Yet Another Side Table
The work of Charles Limbert inspired me to try and duplicate some of his work, and here is another example. I wish I was better at furniture design, because while fun, duplicating someone else's work is not the same thing and designing and making your own original furniture. Hopefully, some day.
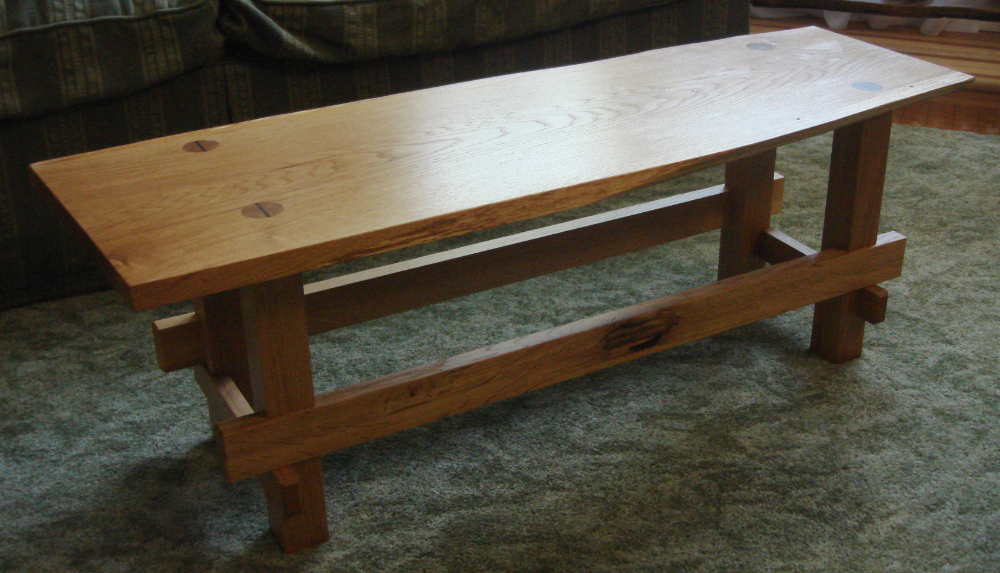
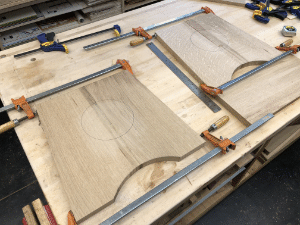
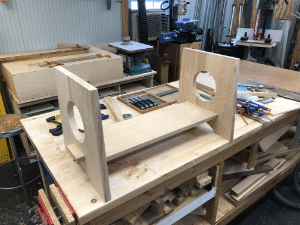
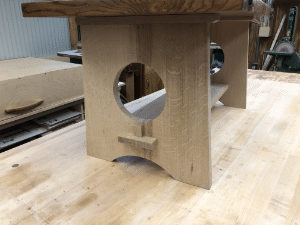
Coffee Table
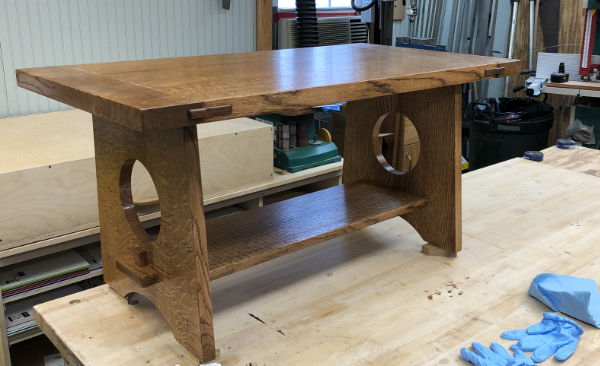
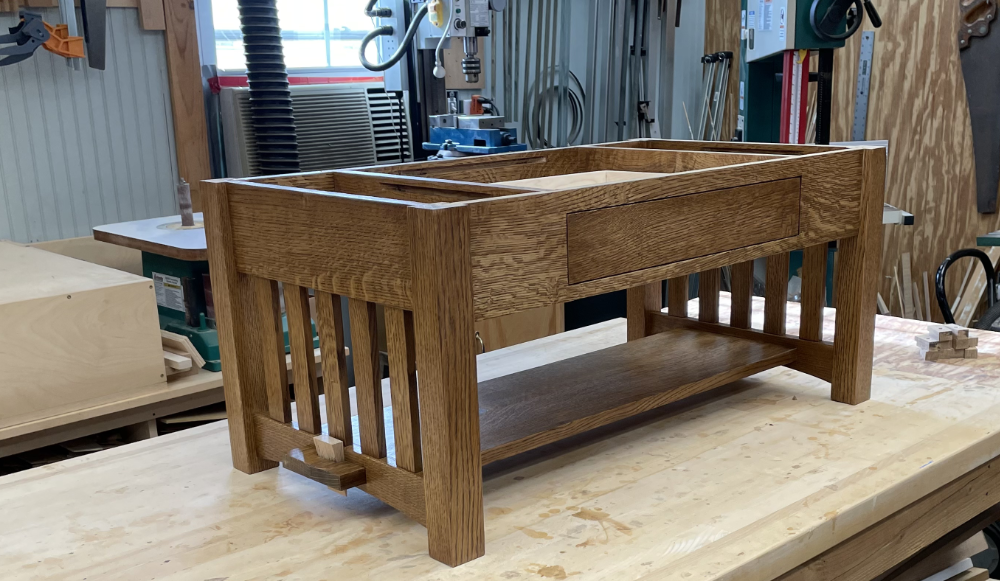
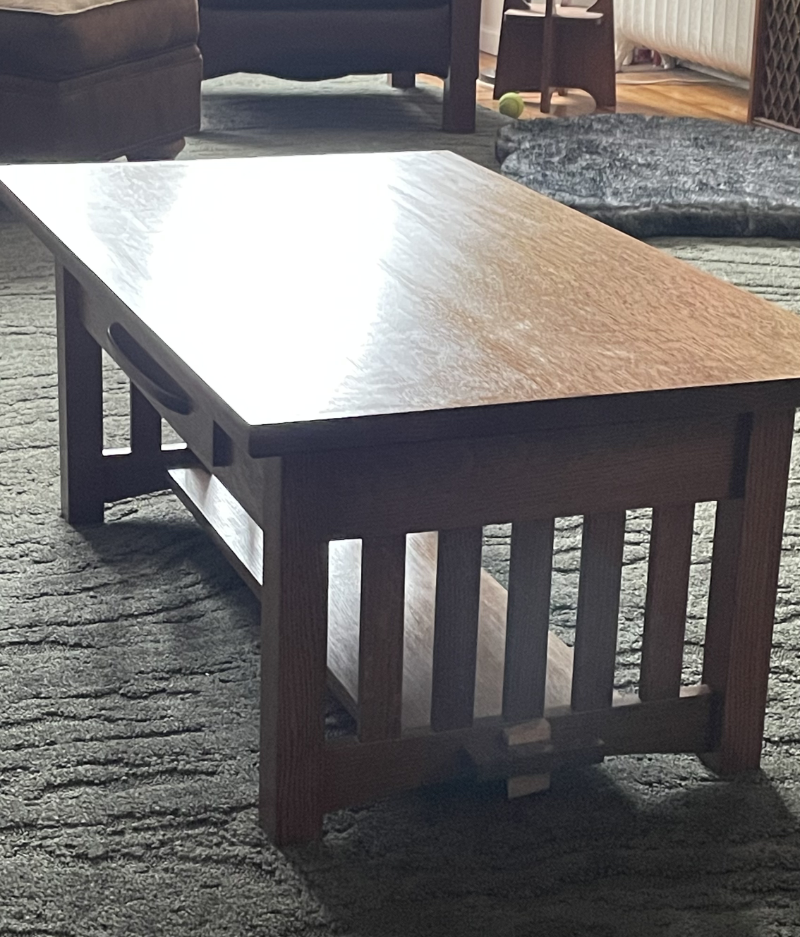
This table I actually did design, although proportionally, I think I should have made it a bit longer. It does, however, fit in our living room quite nicely.
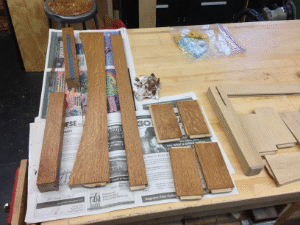
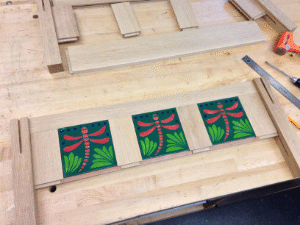
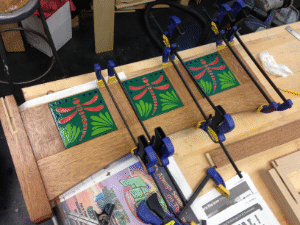
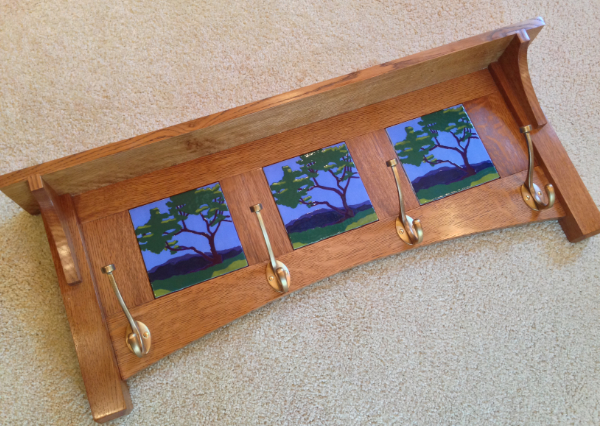
Coat Racks
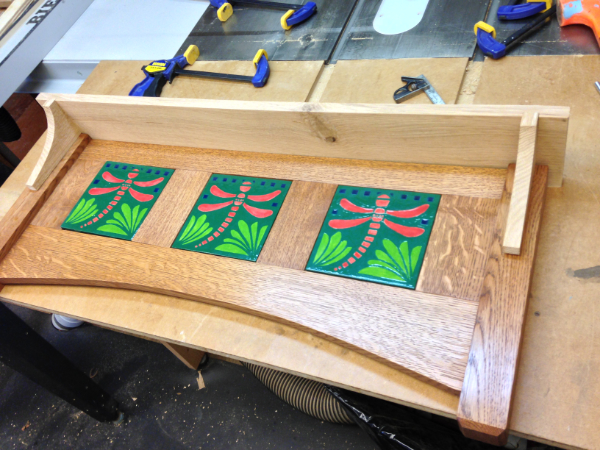
Pat made the ceramic tiles around which these wall-mounted coatracks were designed. Some construction details follow.
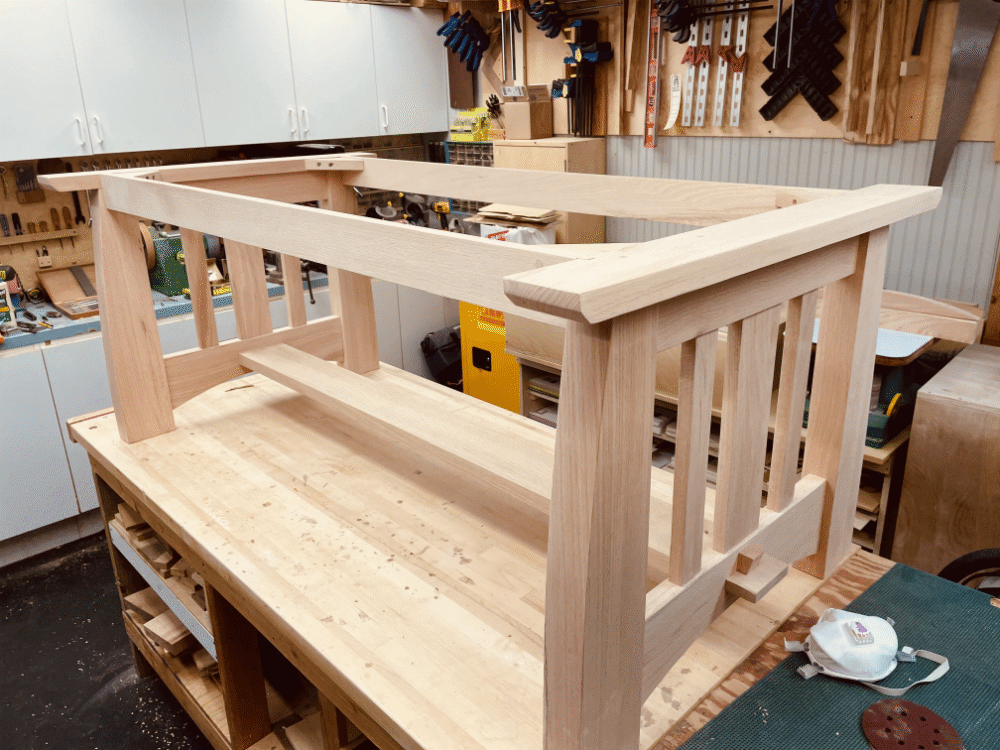
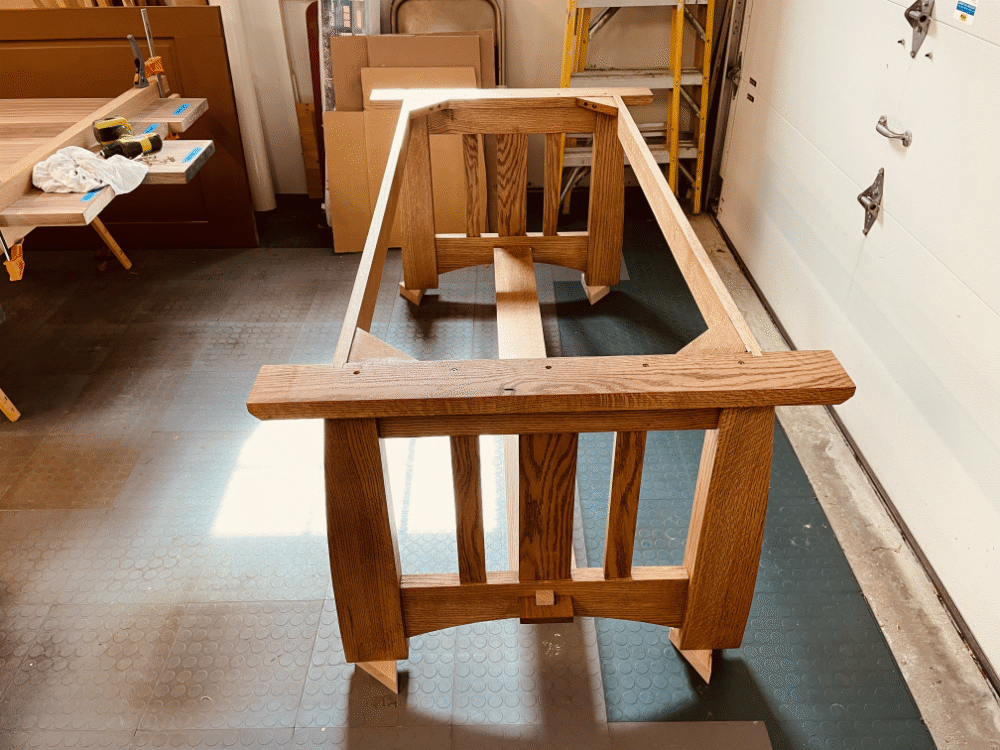
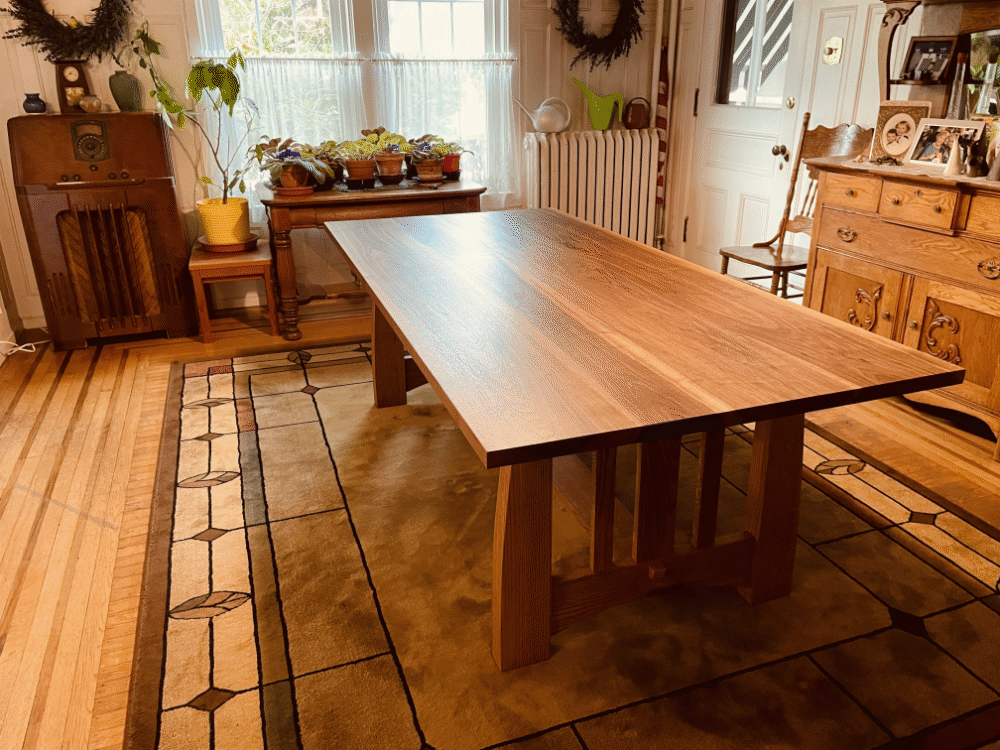
Dining Room Table (Summer 2022)
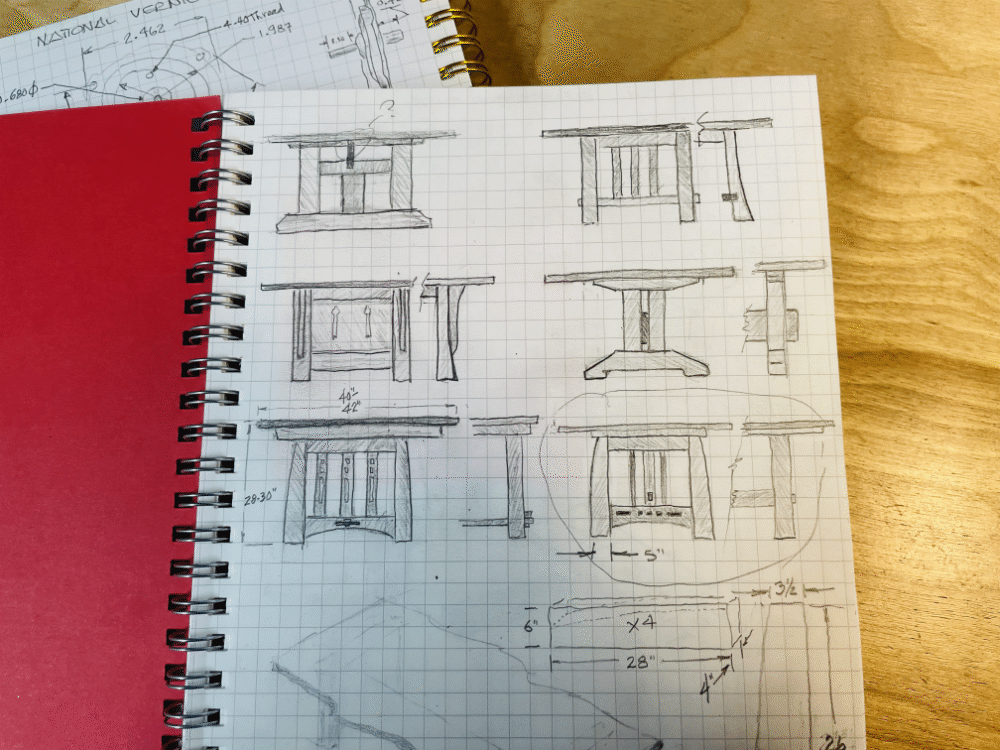
I've been wanting to build a dining room table for some time, and for more years than I can remember I have scrolled through Gooogle Images looking for inspiration and ideas. A project of this scope requires substantial quantities of wood and a commitment; it never seemed to be the right time to tackle this particular project. But this spring I decided that this was the right time, so I called my friend Bill. He has one of those "portable" sawmills (that probable weighs over a ton) and quite a lot of already cut wood stacked at the back of his property under tarps.
I started with some sketches of some web images and began to look at what Bill had in the way of previously cut timber. I settled on Red Oak.
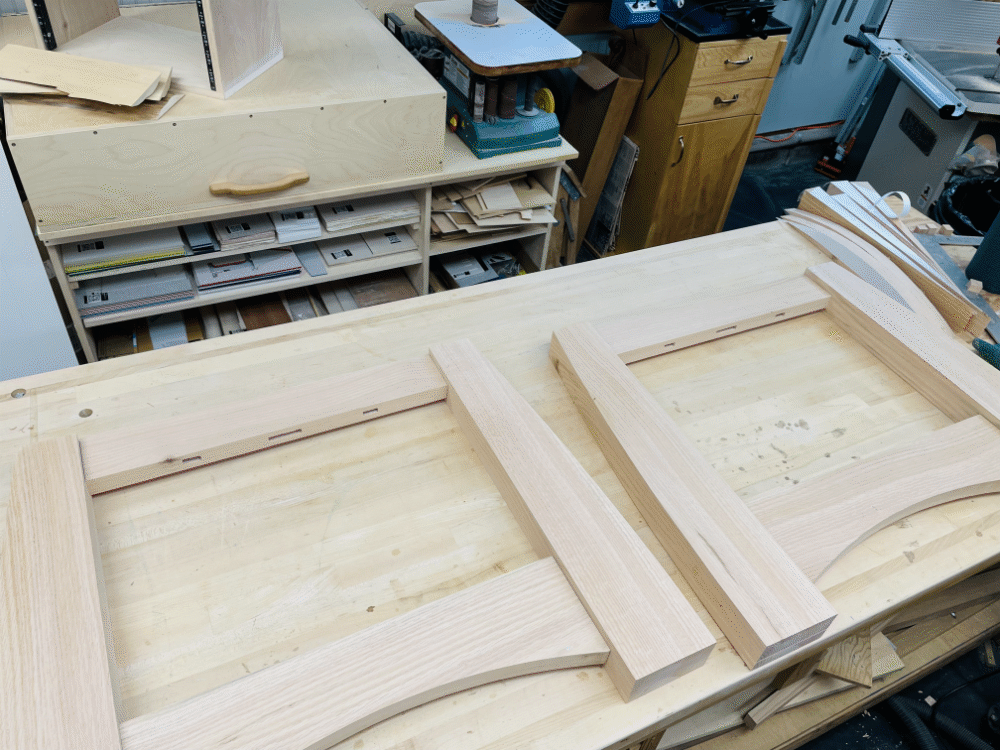
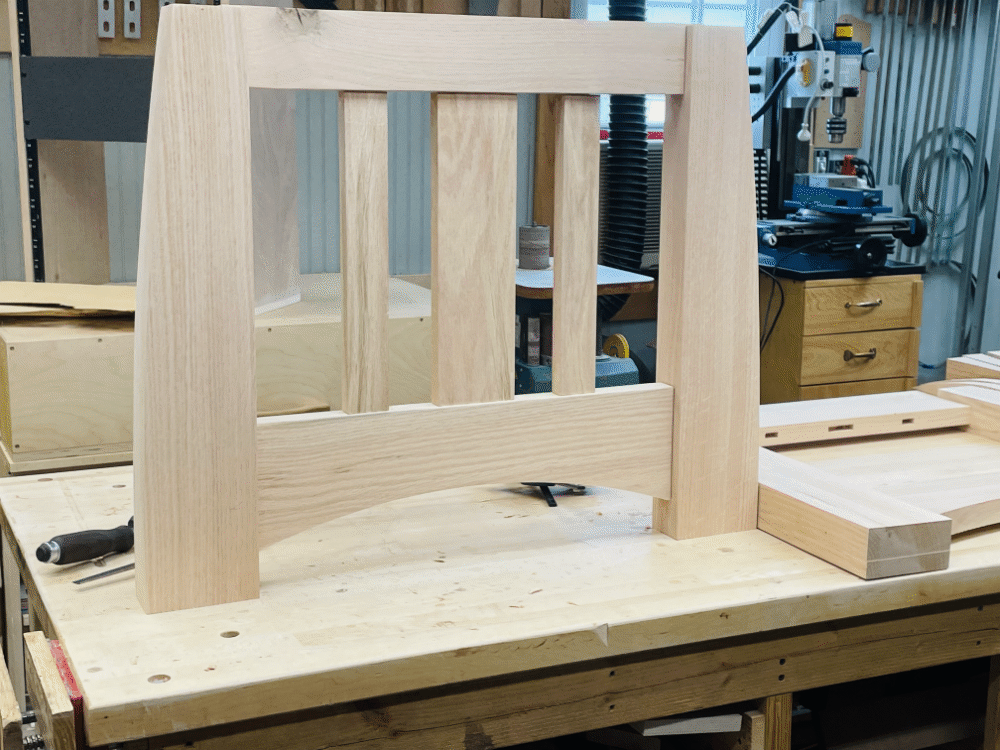
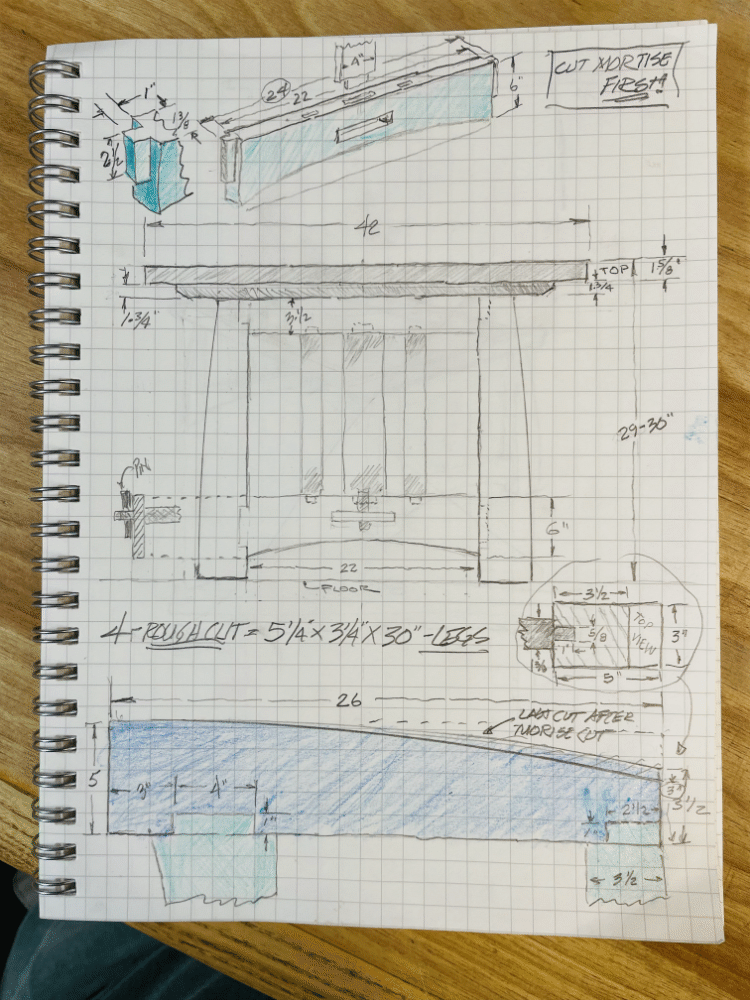
Like all my projects, I make adjustments along the way for many different reasons (cut it 3 times and it's still too short) so I changed the legs to give them a little more curve, so 3" at the top insead of 3-1/2". I have to sketch to visualize how things go together or look.
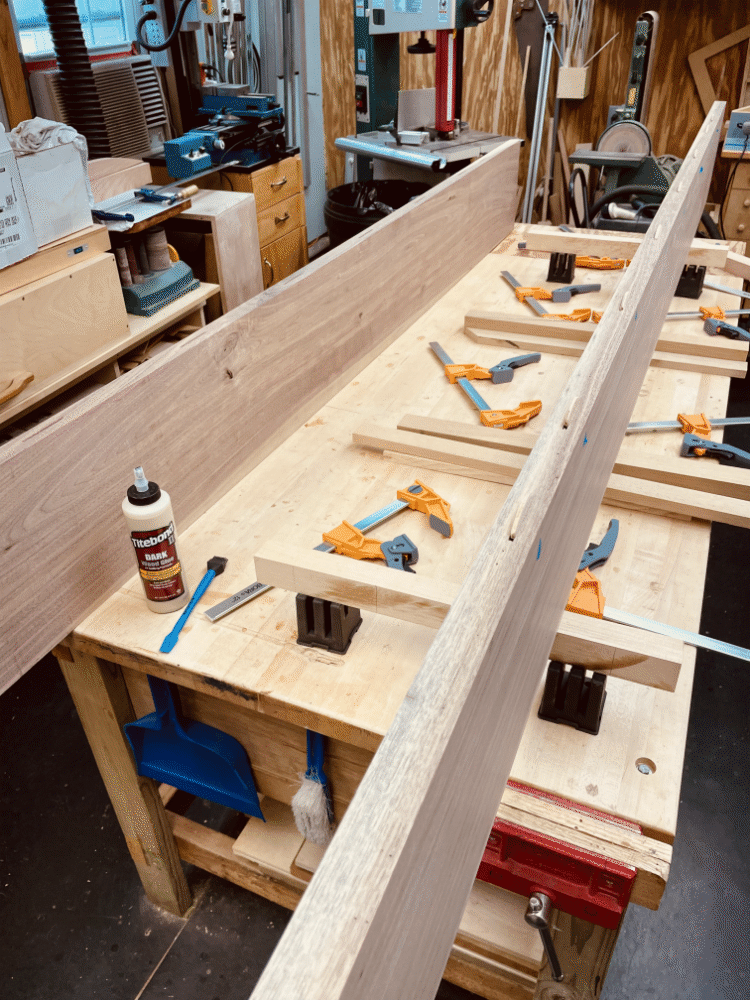
Dining Room Table Continued... (Fall 2022)
After many hours of internet searching I found the finish I would like to use on the table. I have a lot of respect and get a lot of ideas from the YouTube videos by Cam at Blacktail Studio. While Cam specializs in wood slab tables, he meticulously demonstrates techniques for many aspects of woodworking. I especially like the fact that he shows when he screws something up and how it happened.
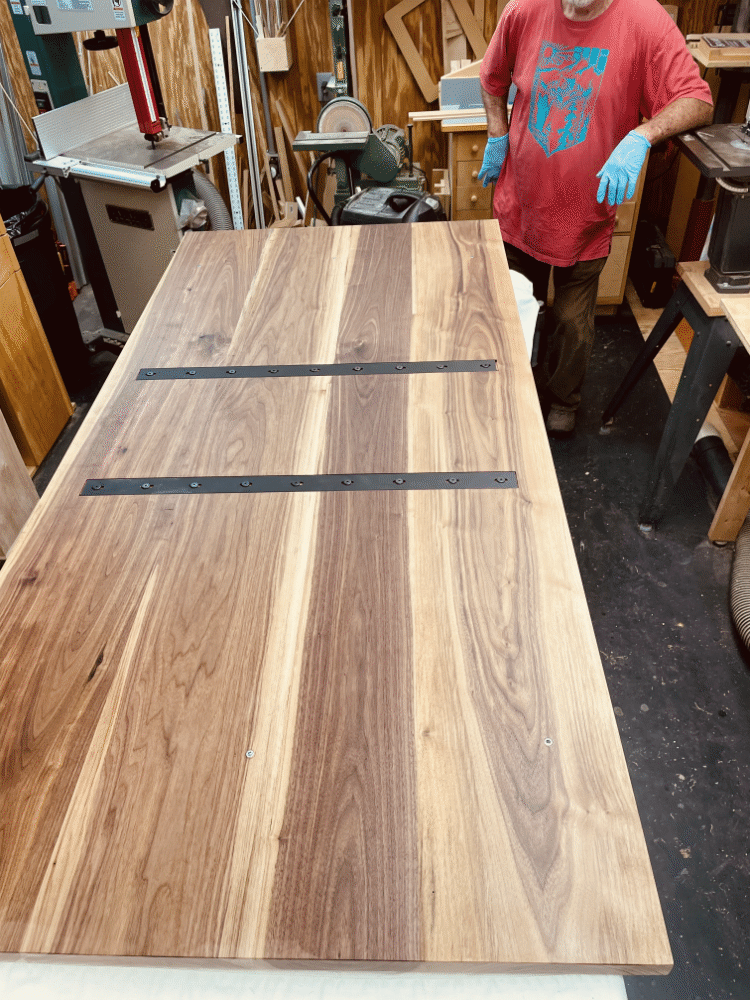
Anyway, I was introduced to Rubio Monocoat on the Blacktail videos and decided that the advantanges of this finish was what I was looking for, especially the fact that repairs to damages to the finish are easy to repair without sanding and refinishing the entire tabletop. I used it on the table base pictured left. And plan to use it on the tabletop.
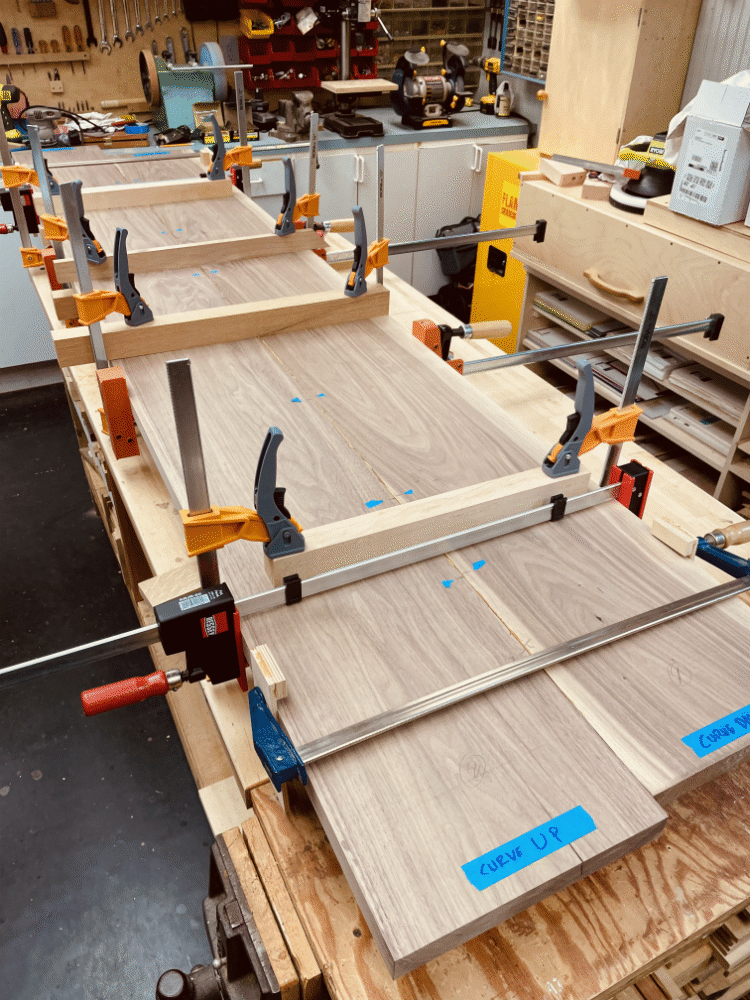
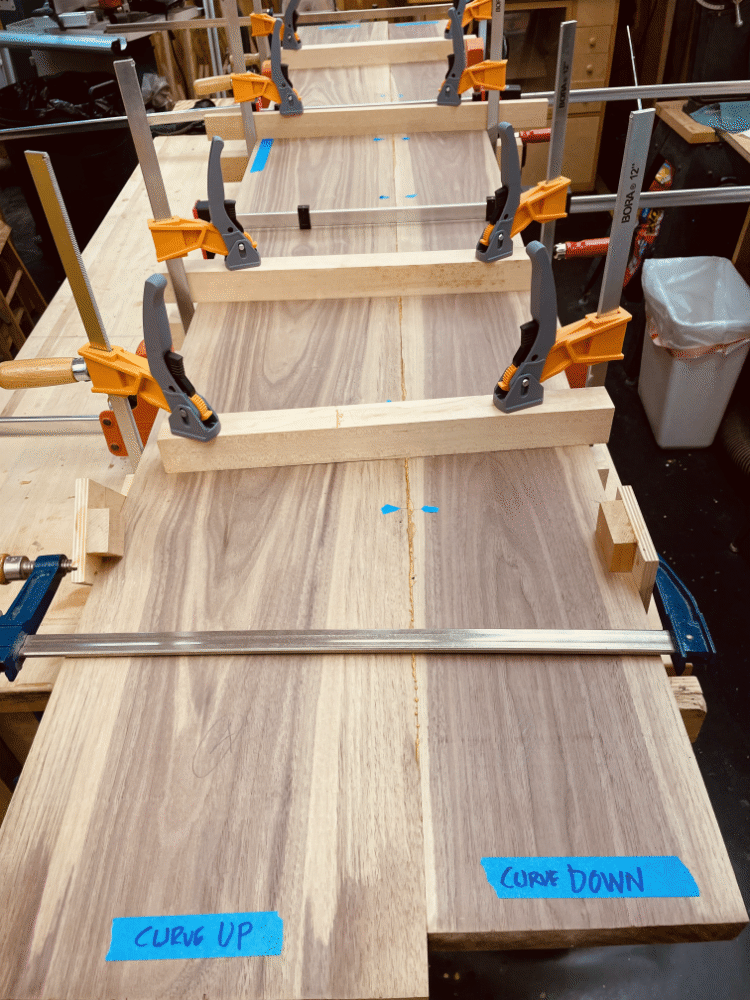
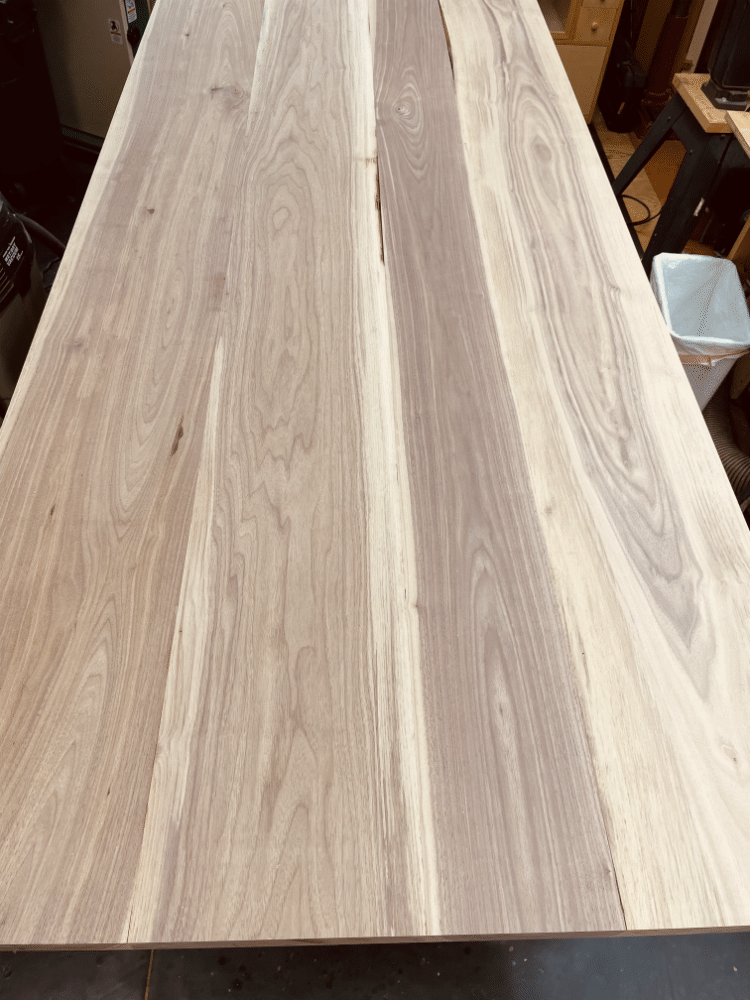
I chose black walnut for the top. I originally thought I would use quartersawn white oak, which is my go-to wood for most projects. While I love the look of QSWO I decided to try something more dramatic. I haven't made anything out of walnut since I was in college, so I thought this would be an adventure.
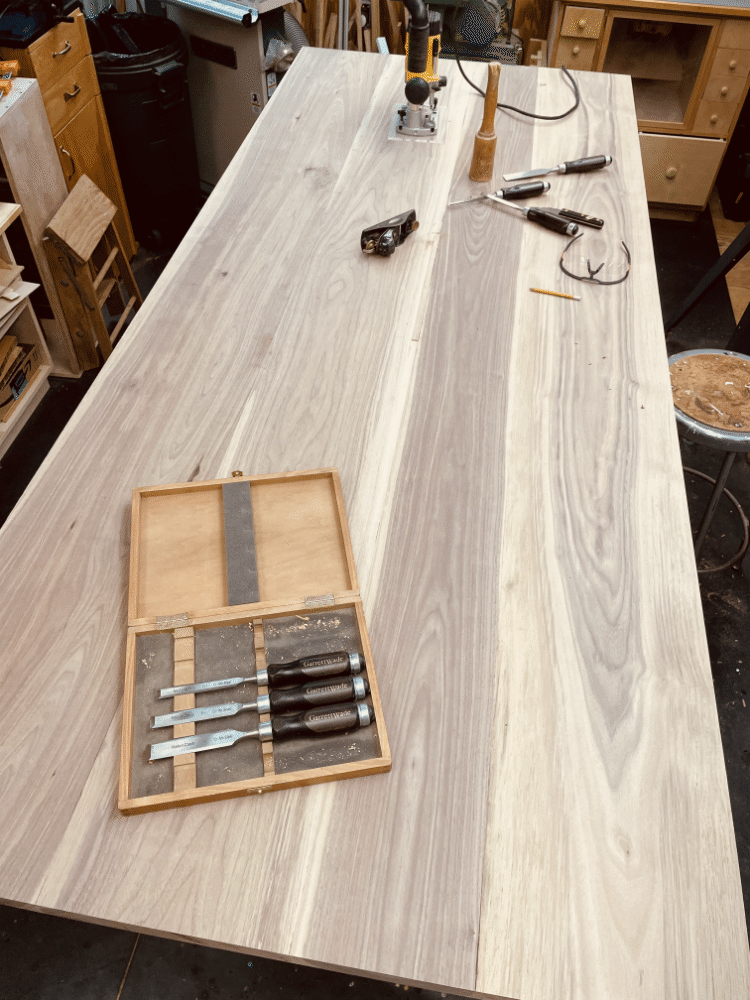
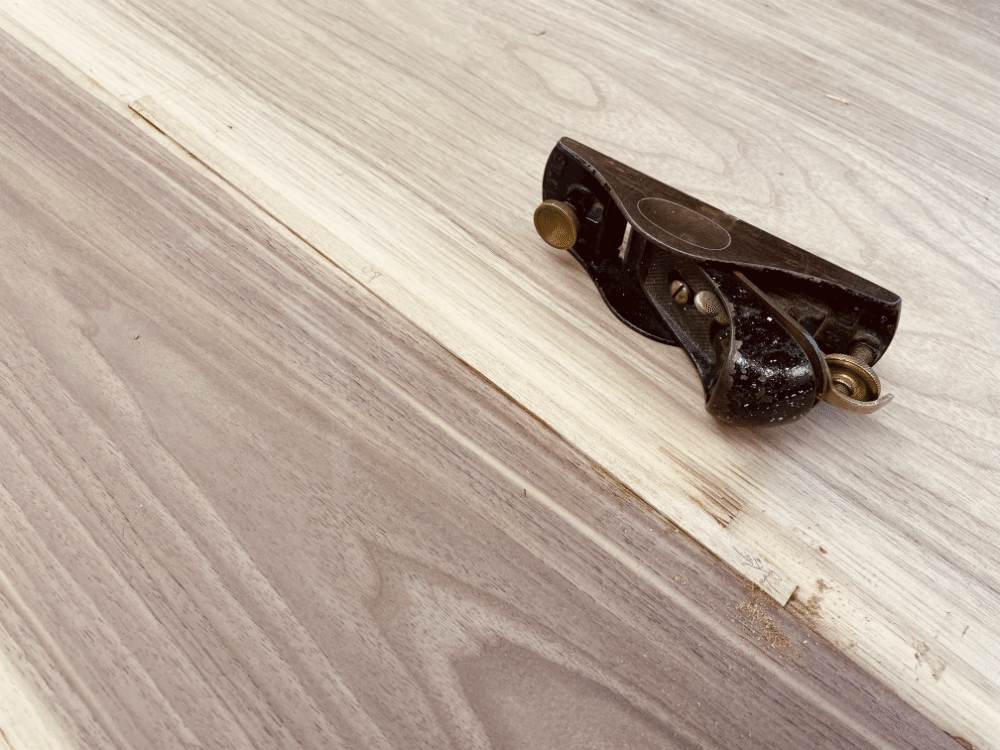
I bought about 60 bf of 6/4 black walnut from Williard Brothers, in Trenton, NJ. They have a huge collection of many species of wood and a good mill shop. My jointer isn't up to par so they joined the edges to make it easier for me to glue up. I used biscuits to help align the pieces. The image left is the underside of the top after gluing. There were a few places that I wanted to piece in, and the underside was good place to practice.
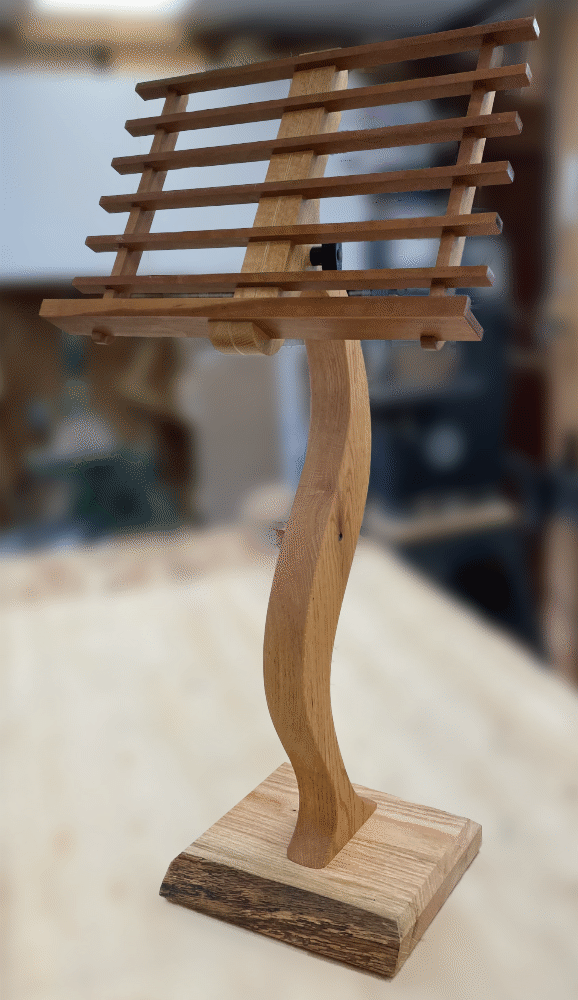
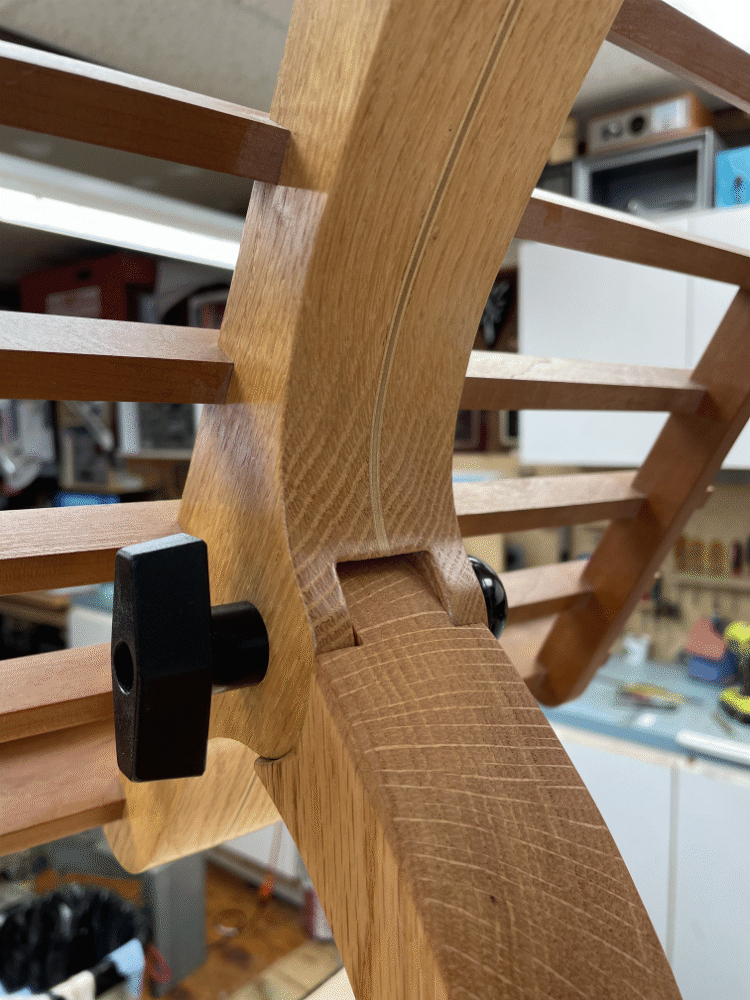
Music Stand Fall 2022
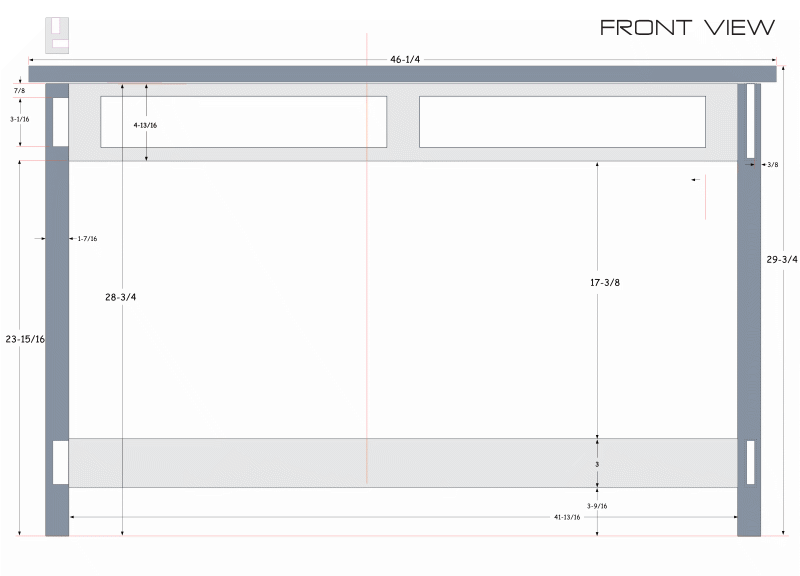
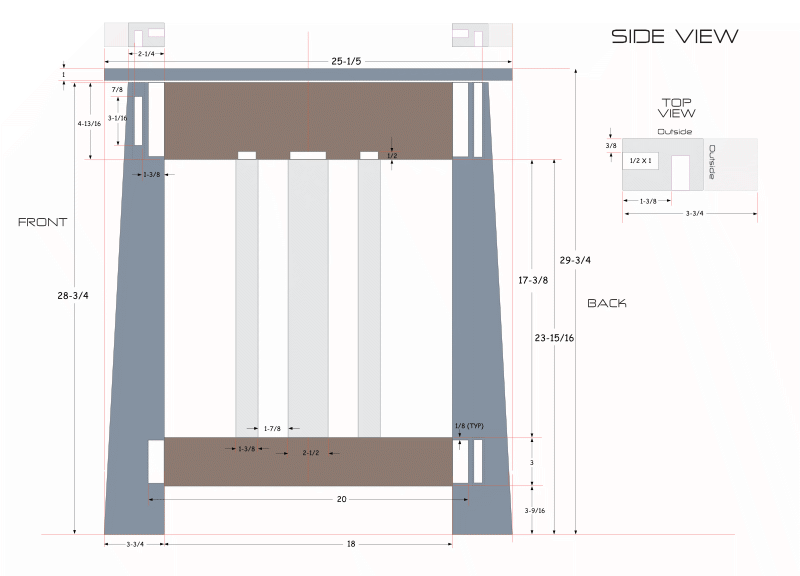
Mission Style Coffee Table - Winter 2024-25

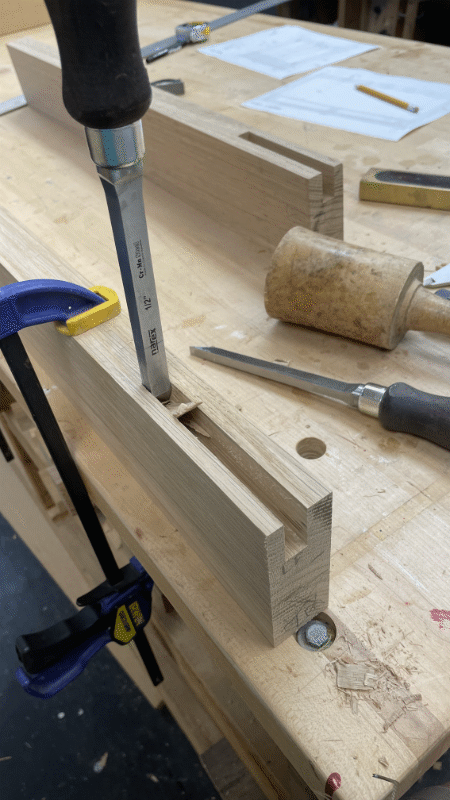
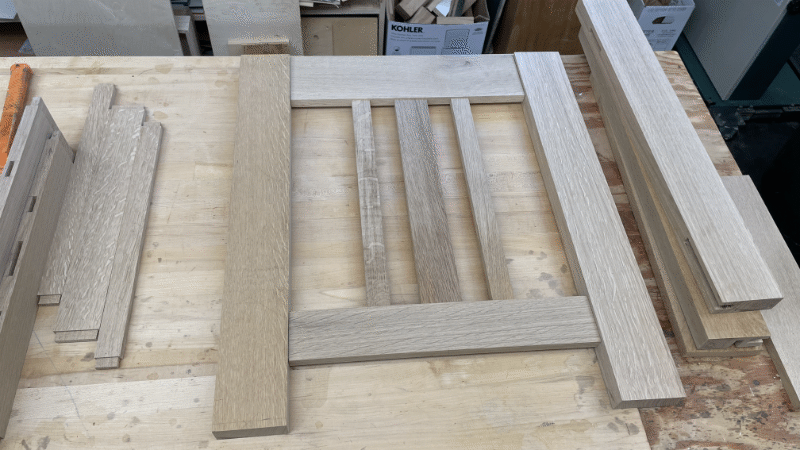
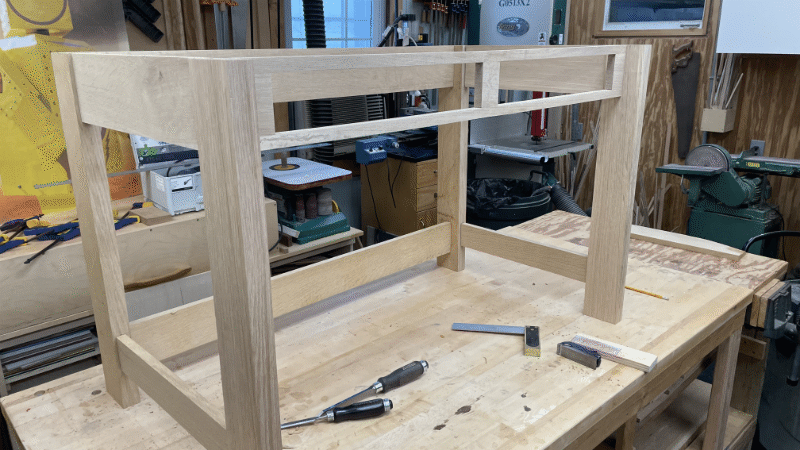
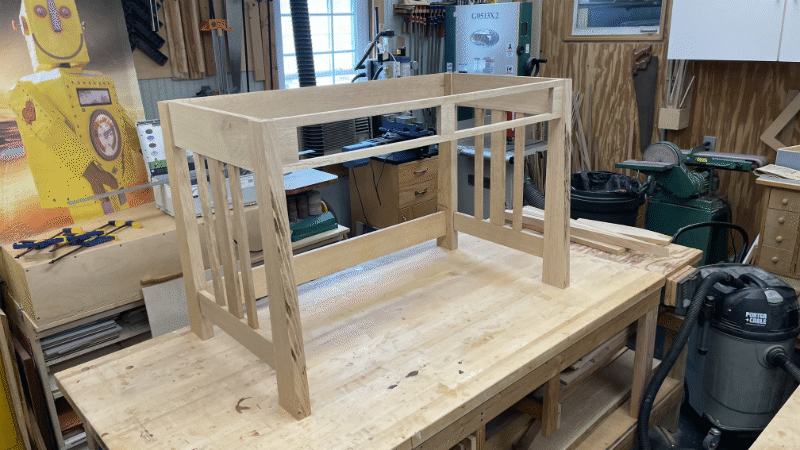
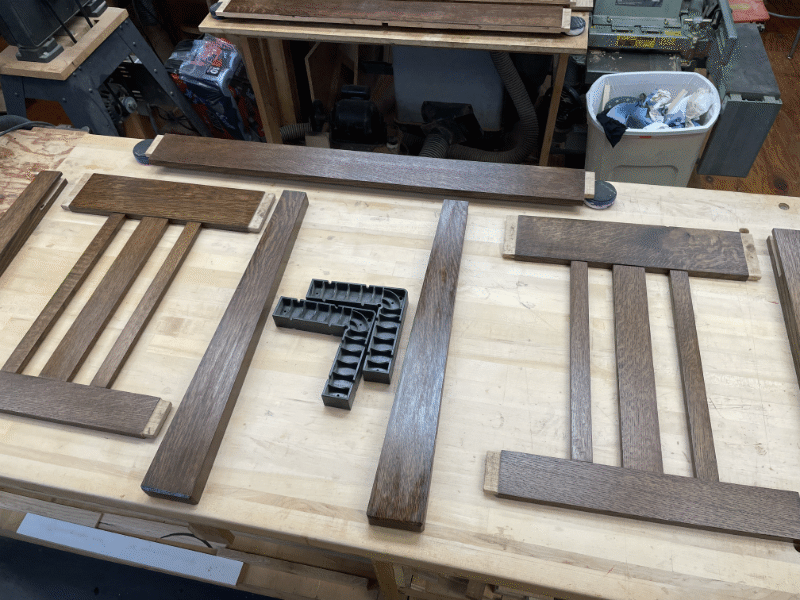
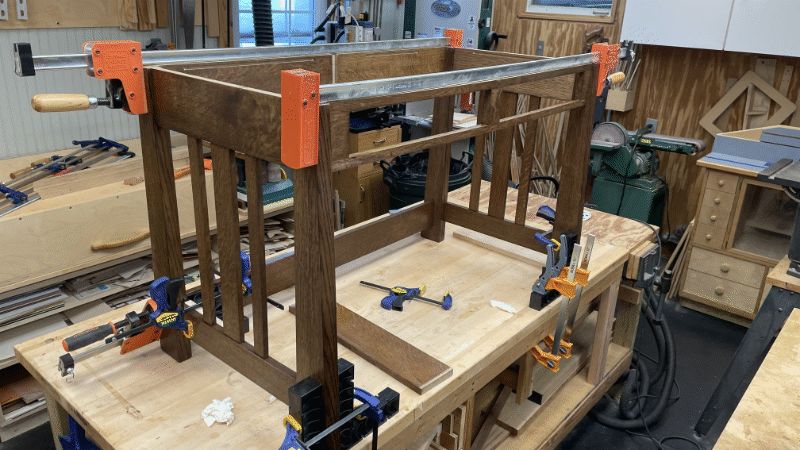
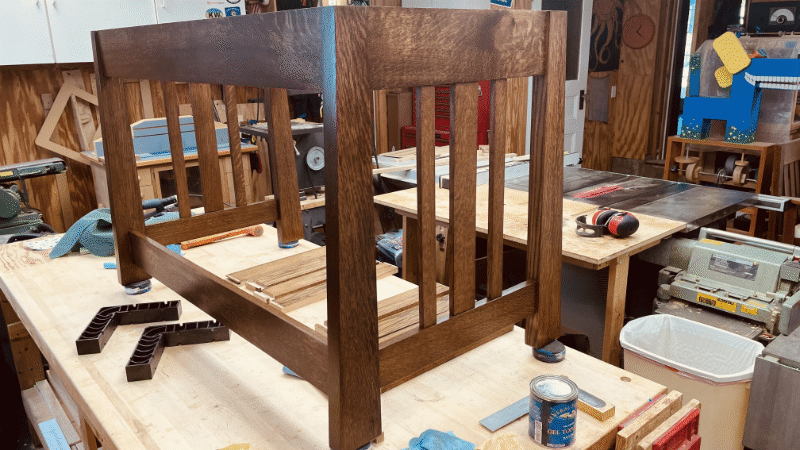
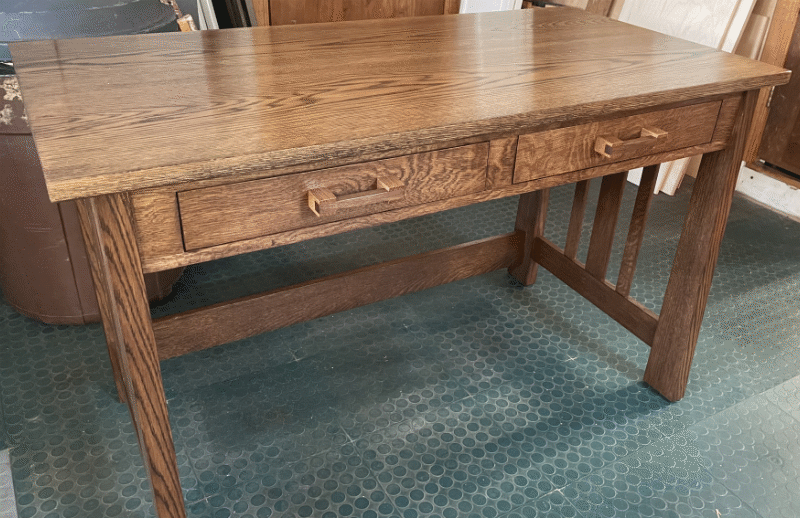
Mission Style Desk - Summer 2025
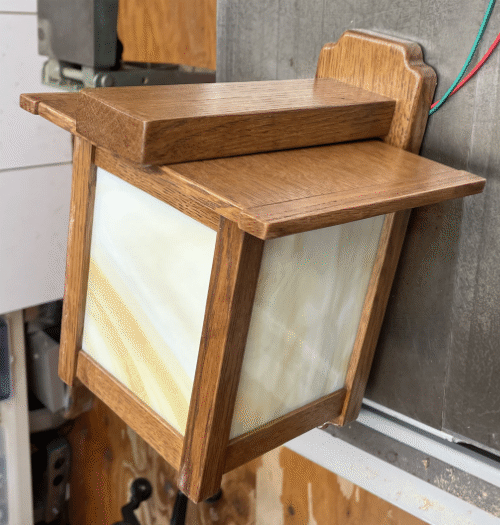
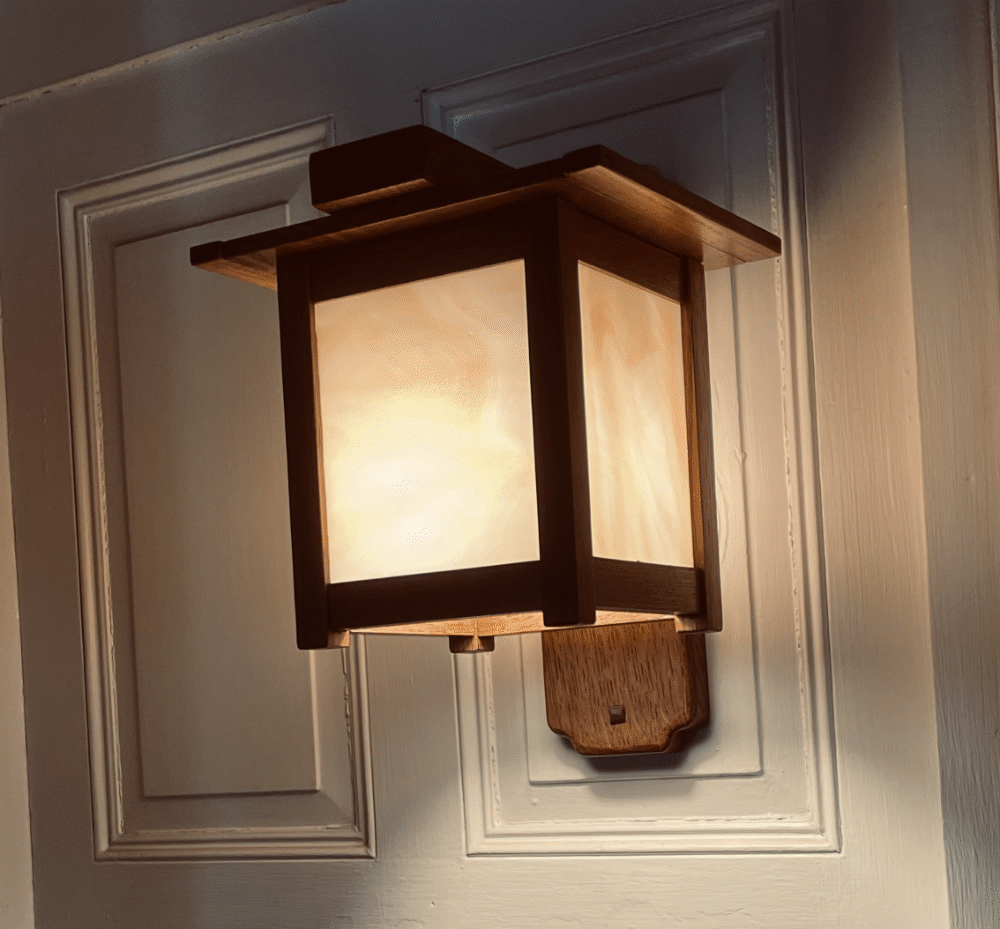
Arts & Crafts Style Wall Sconce - Fall 2025
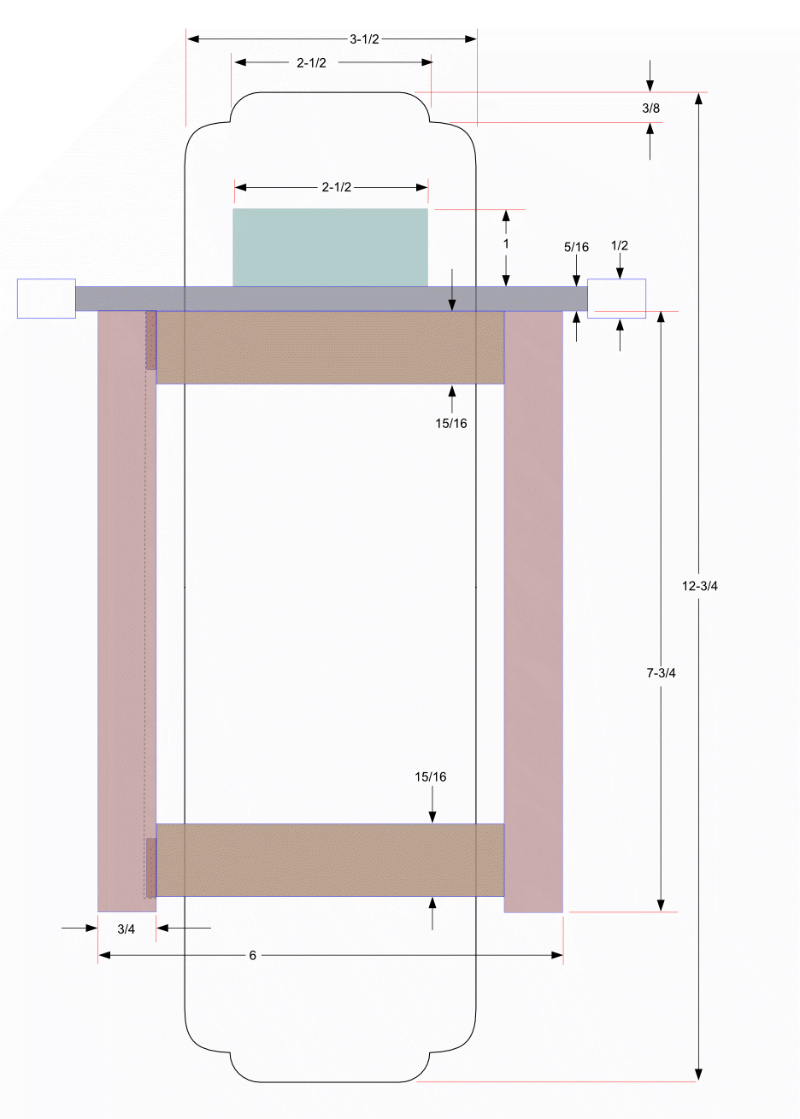
Saw a photo of an Arts and Crafts sconce and just had to try my hand at producing something similar. I am used to working on larger projects that involve larger pieces so my challenge was to work with quite a bit smaller parts.
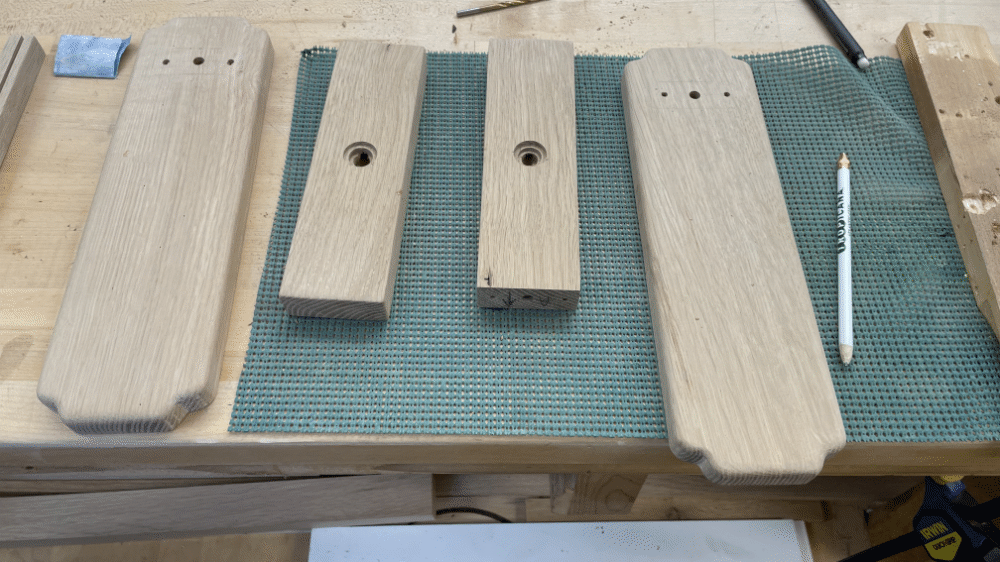
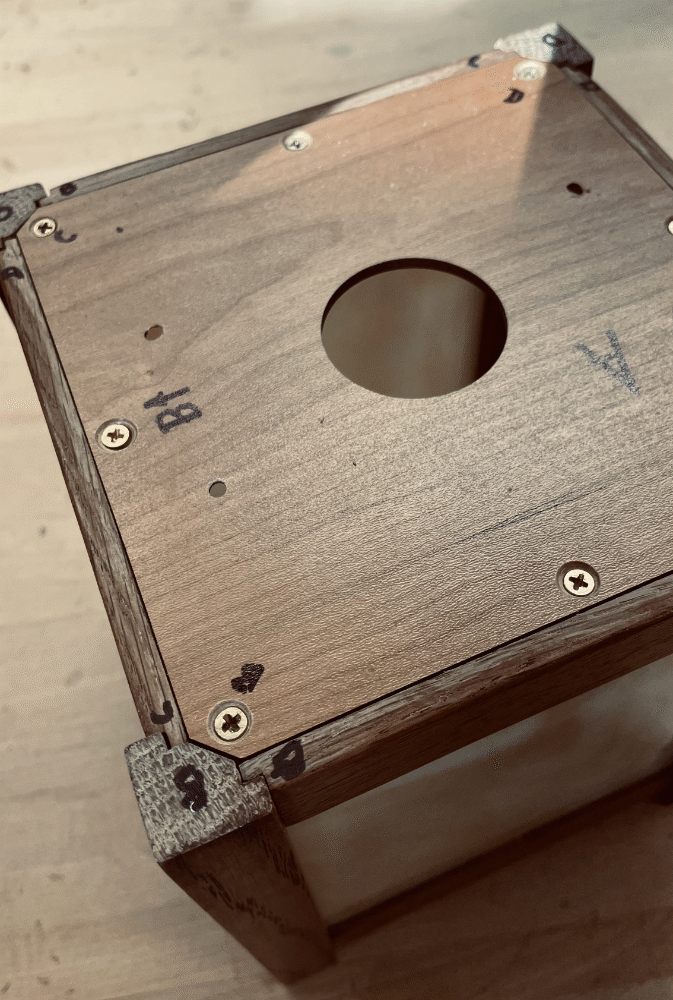
These pieces were quite easy. For the back I cut out a template from 1/4" MDF on the laser cutter (and routered the shape) in order to keep both backs identical. I wanted to make two sconces. Note that the horizontal pieces are drilled to the stepped holes on the underside to accept wires. The stepped holes are to clear the washer and nut for the E17 socket.

I chose a E17 size socket for the LED bulb so that it could be fastened to the flat top piece shown above.
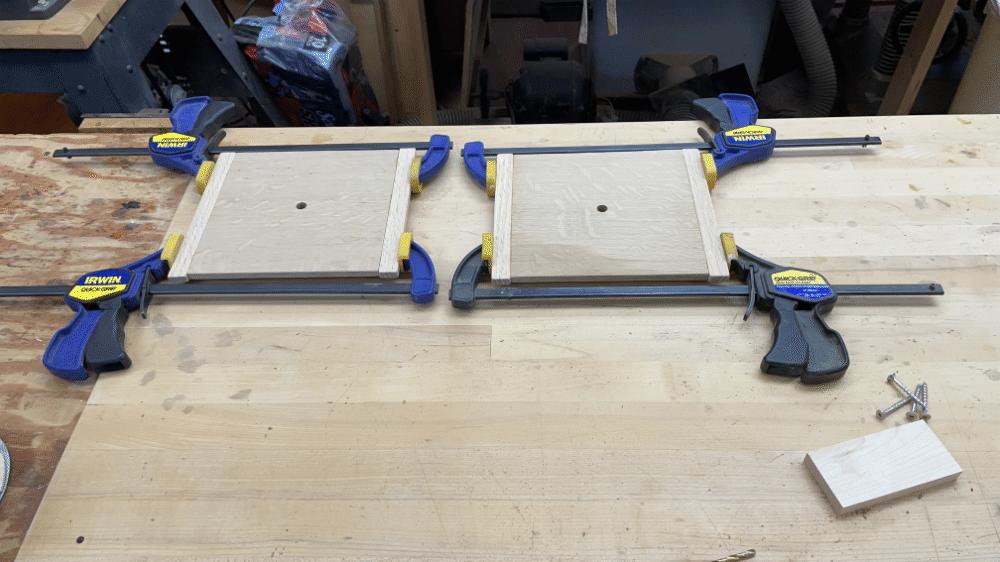
Dry fitted all the pieces for the glass enclosure before staining and finishing each piece. Thought that would make finishing a bit easier, although I found it difficult to keep from scratching pieces when gluing up and putting in the stained glass.
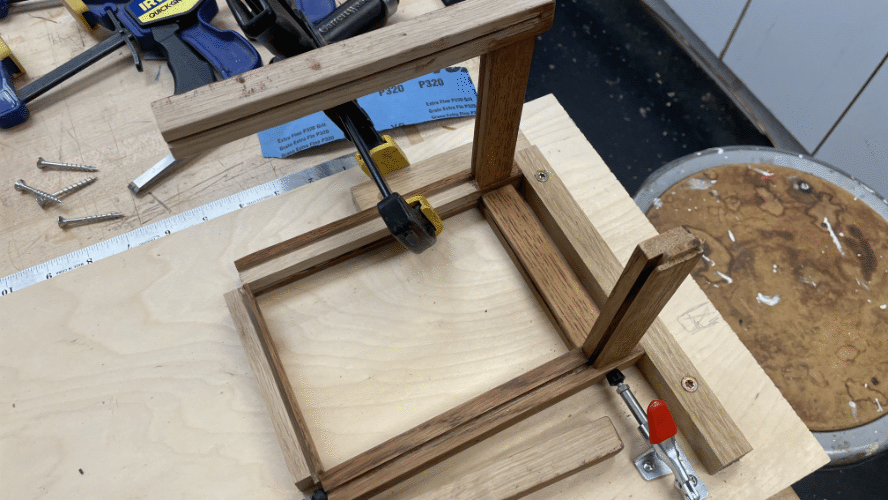
Made a simple jig to keep the pieces square while gluing.
Here's where I confess to making the dados for the stained glass too narrow. I should have bought the glass first, measured it, and grooved to slots the right size. Instead I figured the stained glass would be 1/8", so I slotted the vertical pieces and the top and bottom pieces on the table saw. I didn't realize I still had a thin kerf blad installed, about 3mm, instead of a standard 1/8" blade. So the glass would't fit. So I spent hours trying to widen the slots of the side and bottom pieces that were already glued up. Top pieces were no problem because they float and are fastened to the top, so they could be run through the saw again to widen the kerf.
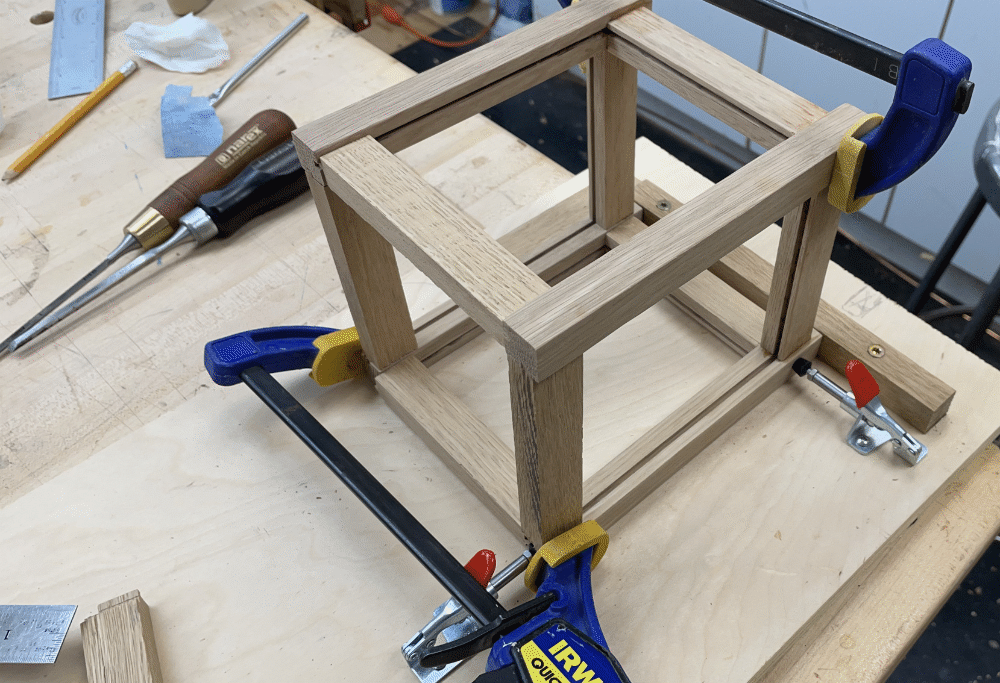
I wanted to be able to replace the stained glass if it broke, so I used the laser cutter to cut a top piece that would both fasten to each of the four pillars and each of the four top pieces that hold the stained glass.
I wanted to be able to replace the stained glass if it broke, so I used the laser cutter to cut a top piece that would both fasten to each of the four pillars and each of the four top pieces that hold the stained glass.
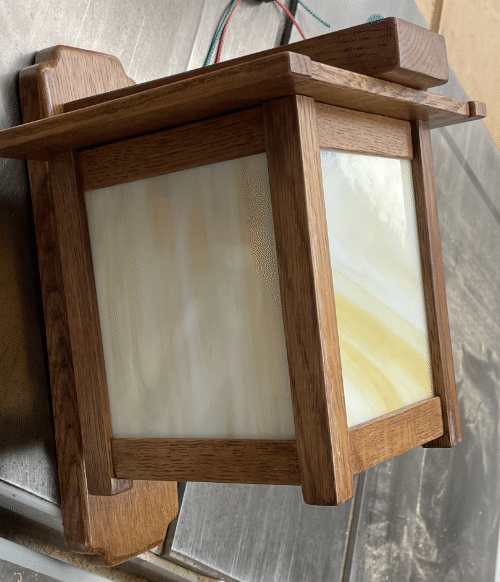
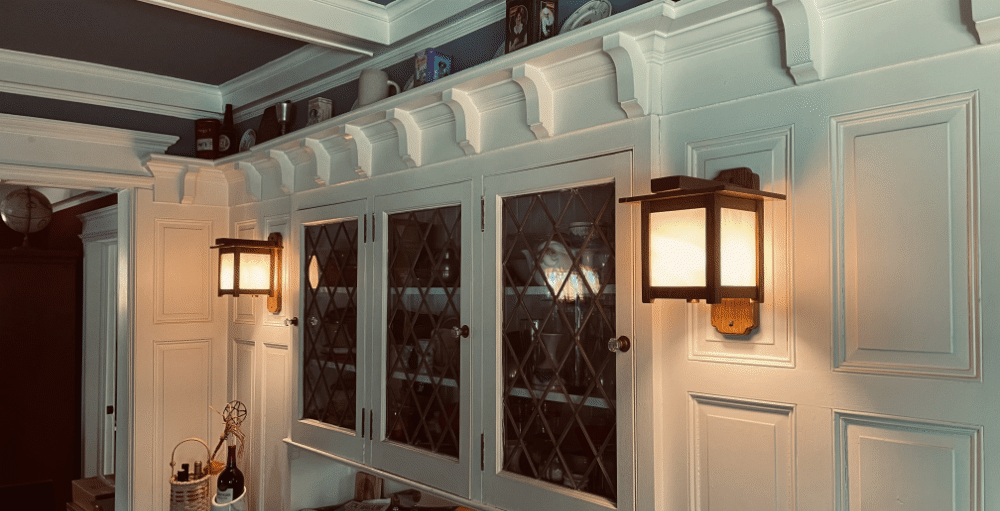
Sconces mounted in our dining room.